Last year NC and I moved in to a new house, and between school and work I’ve been trying to find time to incorporate creative decorating ideas.
Months ago I stumbled upon a great piece (similar to this) which used maps as a decorating medium.
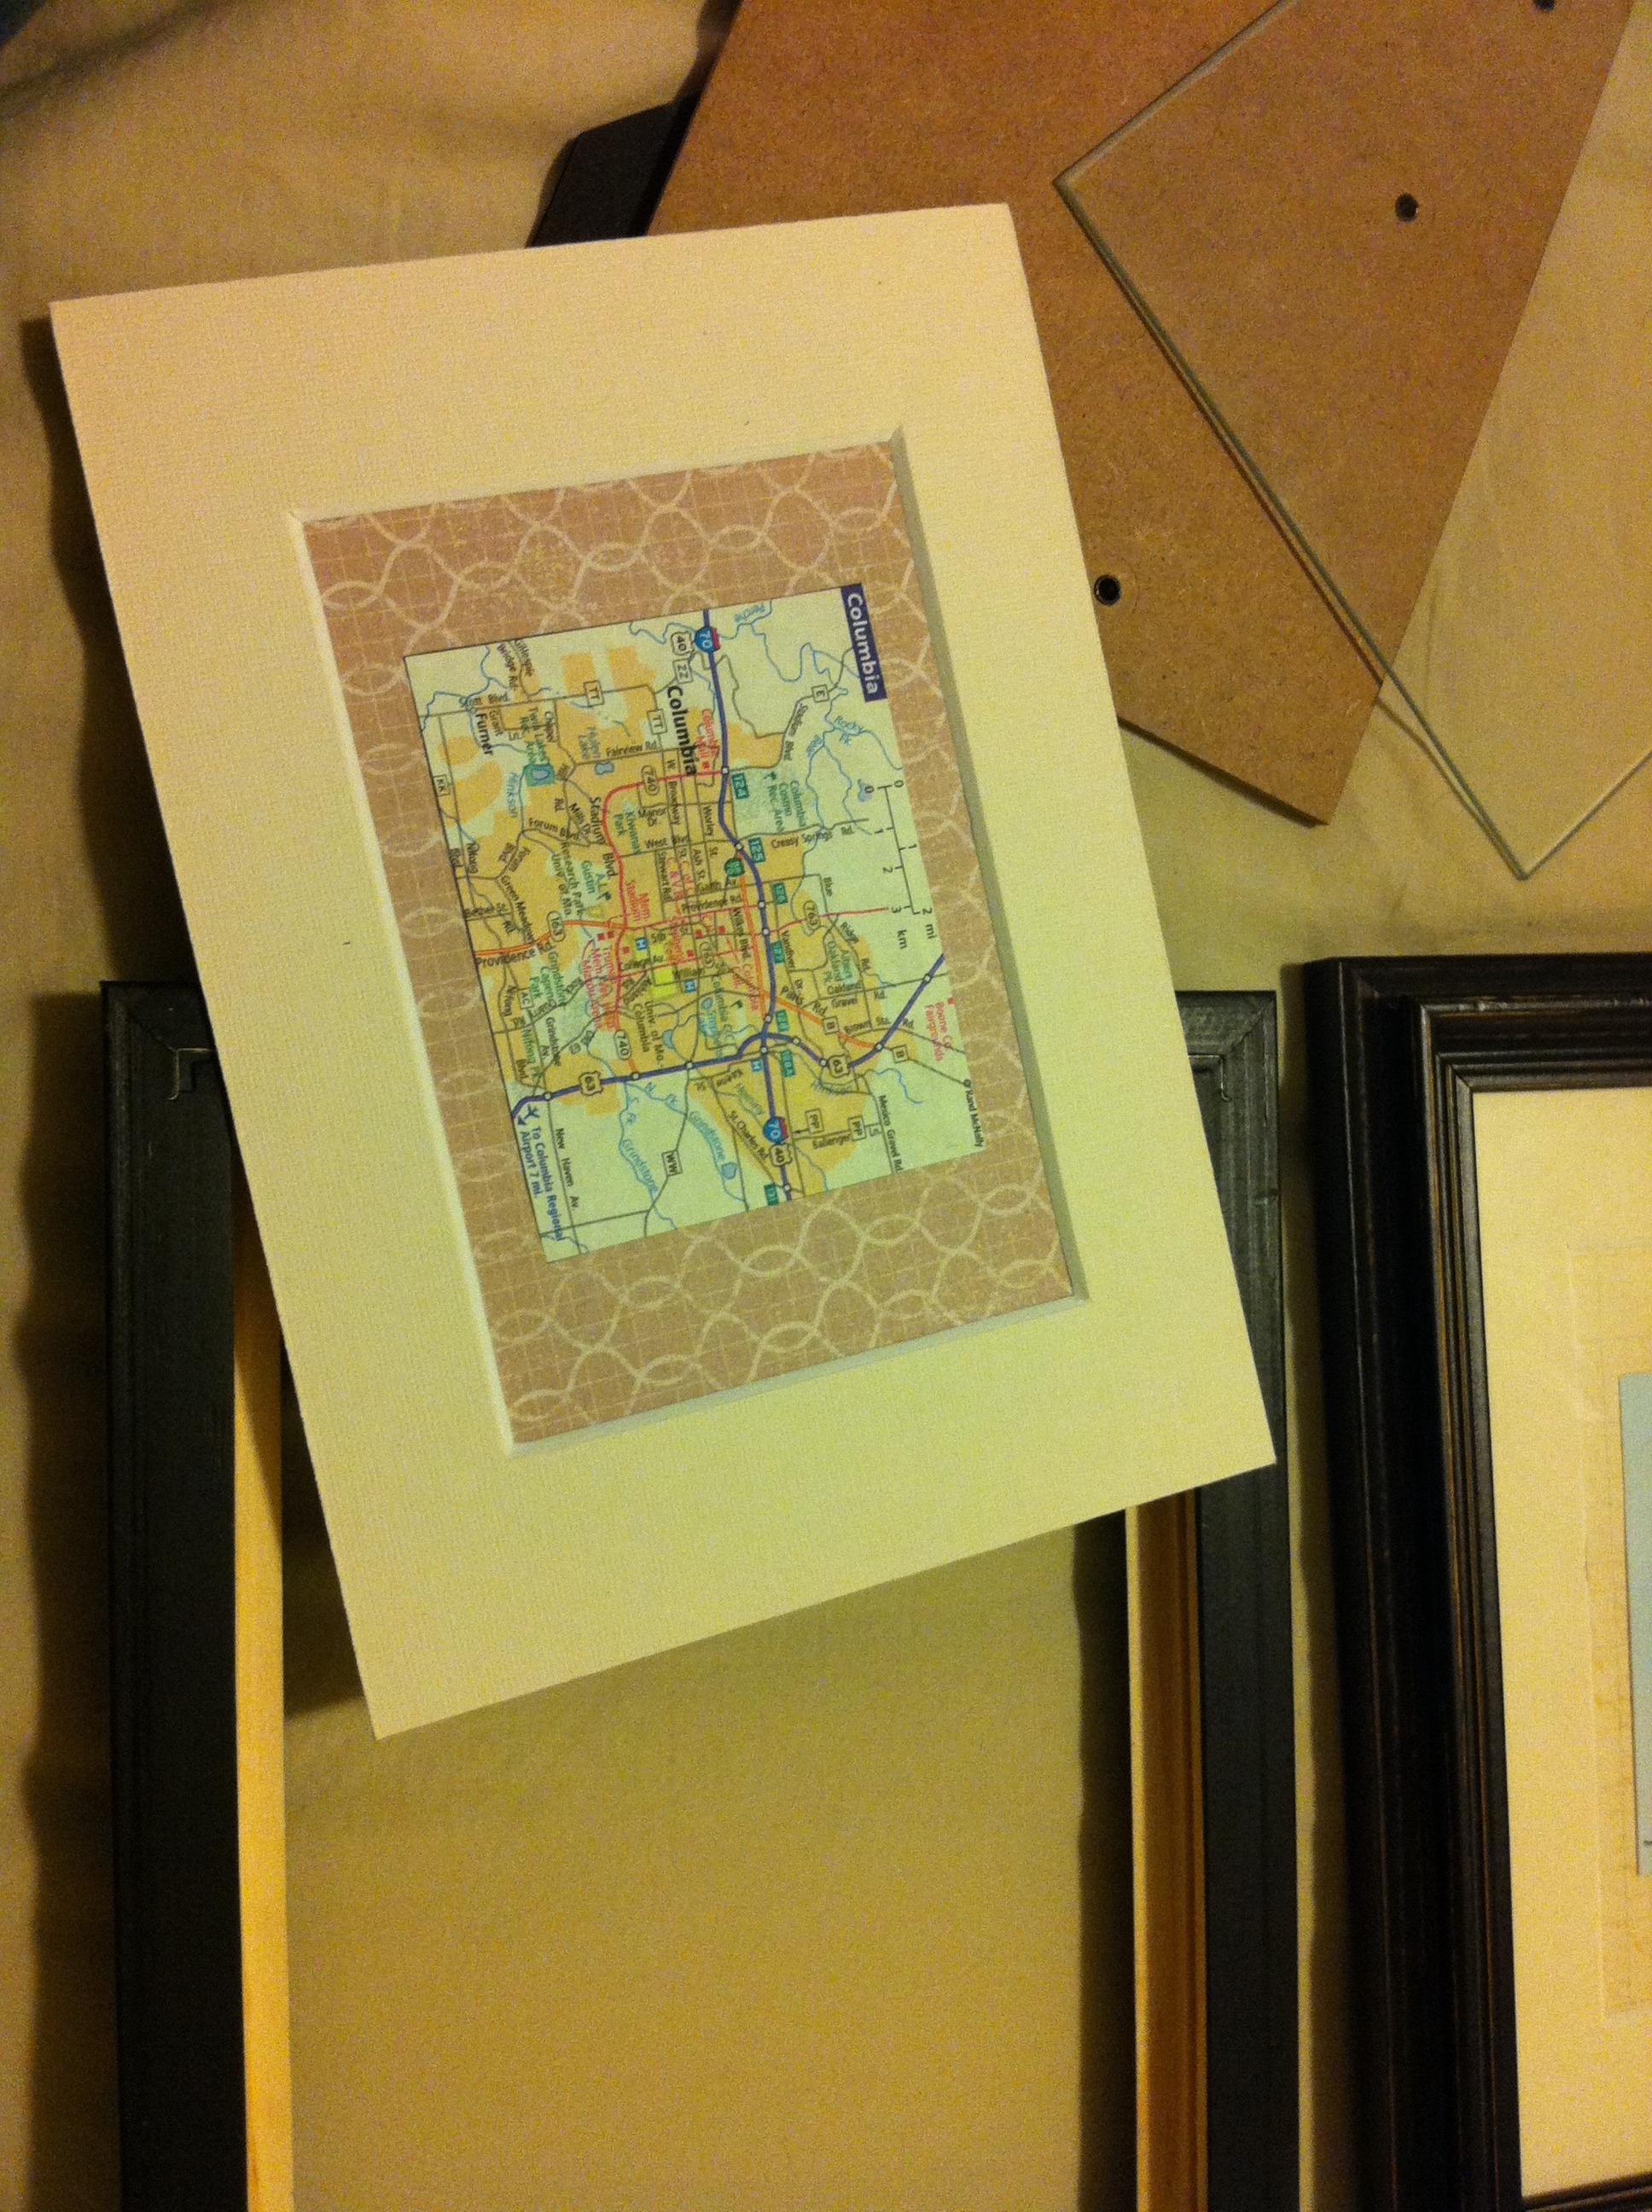
I loved the idea but wanted to make it more personal. The result is four framed maps, each representing a place that is significant to our relationship (where we met, our first vacation, etc).
This project cost about $20 and adds a little personality to our home.
You Need:
– Picture frames. I used 5″x7″ that I found at Michaels for $3 each.
– Matting
– Scrapbook paper. This depends on the size of your maps.
– Maps
– Adhesive. I used Mod Podge, but any glue or tape will work.
Steps:
1. Cut out equally sized maps. You can center on a specific place or just pick a random section.
2. Trace the outer edge of the matting onto the scrapbook paper and cut. Your paper should either match or be slightly smaller than the matting when held together.
3. Center the maps on the scrapbook paper and attach with your adhesive of choice.
4. Layer the paper and matting behind the glass and close the frame.
There you have it! Short, simple, and a nice conversation piece to have at home.


THANK YOU FOR BEING CREATIVE! I love you craft posts.
Thank you! I’m glad a few of you are enjoying them. Hopefully I can make this a career someday.
I love this!! You’re so crafty. 🙂
Thank you! Look for my post about space savers and decorating for dorm rooms, coming soon!